Blogs
May gardening checklist: What to do in your garden this month
on Apr 30 2025
May is one of the most exciting months in the garden. The days are longer, the soil is warming up, and flowers and plants are bursting back to life. Whether you have a large garden or a small patio, there’s plenty to do to set your space up for a vibrant summer. In this blog, we’ll guide you through the most important gardening tasks for May, from planting to pruning—and even planning ahead.
Here are some practical and fun things to do in your garden this May:
May Gardening Checklist:
1. Plant Summer-flowering bulbs
Now’s the time to plant bulbs like Dahlias, Gladiolus, Calla Lilies, and Begonias. These thrive in warm soil and will reward you with beautiful blooms all summer long.
2. Feed your soil
Give your plants a boost by adding compost or a slow-release organic fertilizer. Healthy soil means stronger, longer-lasting blooms.
3. Weed regularly
As plants grow, so do weeds. Stay ahead of them by pulling them out early, so they don’t compete with your flowers for nutrients.
4. Deadhead Spring bulbs
Once your early bloomers (like tulips or daffodils) fade, remove the dead flowers—but leave the foliage! This helps the bulb store energy for next year.
5. Water smartly
With the days heating up, it’s important to water deeply and less frequently. Early morning is the best time to give your garden a drink.
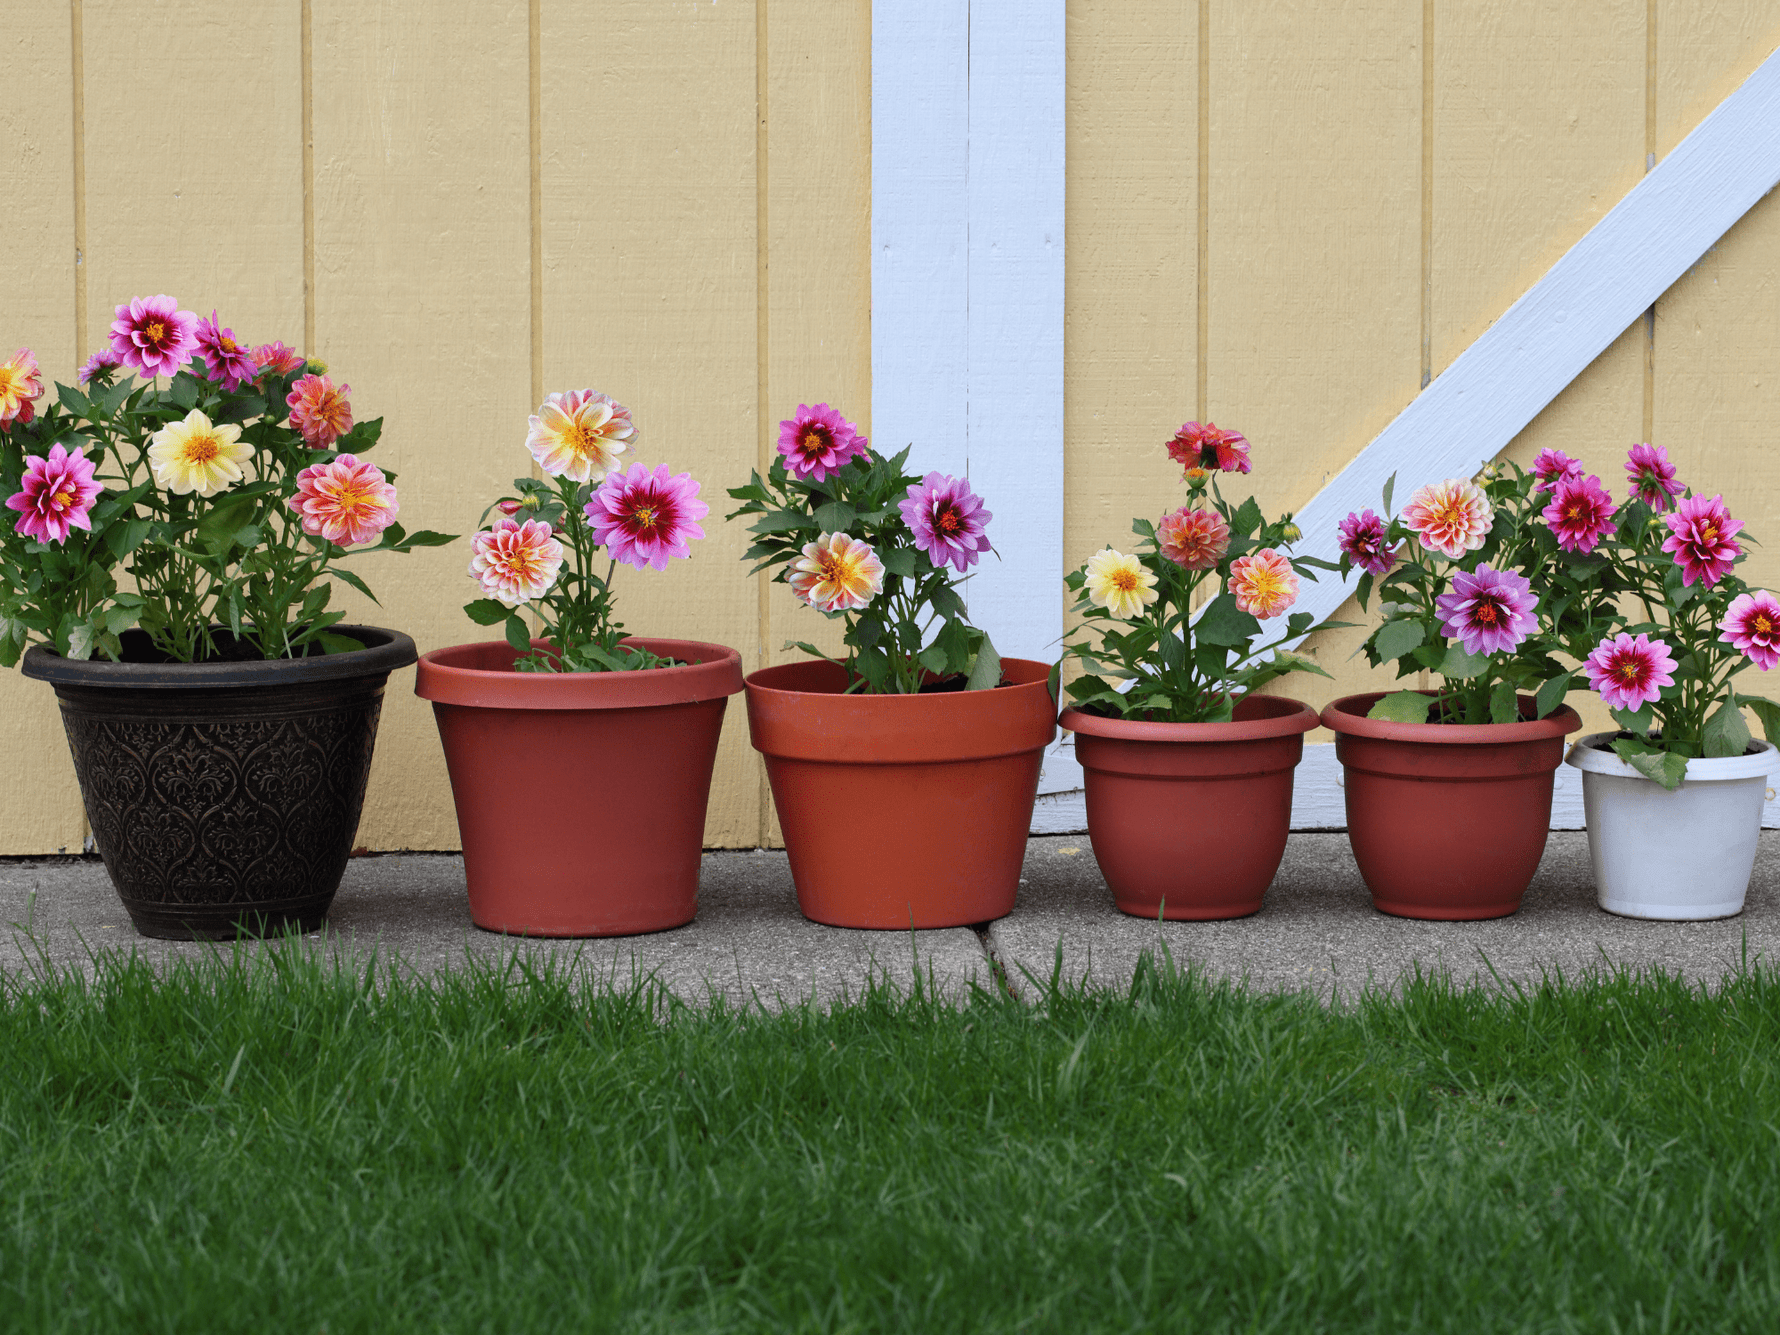
6. Start container gardening
Short on space? May is perfect for planting in containers! Try compact bulbs like Dwarf Dahlias, Begonias, or Lilies for beautiful balcony or patio displays.
7. Plan ahead: Fall bulbs coming soon
While you're enjoying the season, it's also a great time to start thinking ahead. Our Fall bulbs (like tulips and daffodils) will soon be available for pre-order—stay tuned!
May is a magical month for gardening—everything is growing, blooming, and full of potential. A little care now will reward you with a colorful, healthy garden all summer long.
How to prepare your Garden for Fall bulb planting
on Oct 17 2024
As summer fades and the crisp fall air sets in, it’s time to prepare your garden for the upcoming bulb planting season. Fall is the perfect time to plant bulbs like tulips, daffodils, and crocuses, which will sleep through the winter and burst into bloom when spring arrives. However, to ensure a beautiful display of flowers, your garden needs to be properly prepared before planting begins. Here’s a comprehensive step-by-step plan to getting your garden ready for Fall bulb planting.
Step-by-stap plan
Step 1: Clean up the garden
Start by cleaning up your garden. Remove any dead or dying plants, weeds, and debris from your garden beds. This will give your bulbs the best chance to establish themselves without competition. Clearing out old plant material also helps prevent the spread of pests and diseases.
Step 2: Test and amend the soil
Healthy soil is key to successful bulb growth. Test your soil to determine its pH level and nutrient content. Most bulbs prefer slightly acidic to neutral soil (pH 6-7). If your soil is too acidic, add lime to raise the pH. If it’s too alkaline, add sulfur to lower the pH. Incorporate compost or well-rotted manure to improve soil fertility and structure.
Step 3: Plan your planting
Decide where you want to plant your bulbs. Consider the height, color, and bloom time of each type of bulb to create a harmonious display. Bulbs look best when planted in groups or drifts rather than in single rows. Plan to plant taller bulbs like alliums and irises at the back of your garden beds and shorter bulbs like crocuses and snowdrops at the front.
Step 4: Prepare the planting area
Loosen the soil in your planting area to a depth of about 12 inches. This will make it easier for the bulbs to root and grow. Remove any rocks or debris from the soil. If your soil is heavy clay or tends to stay wet, consider adding sand or grit to improve drainage.
Step 5: Mark your planting spots
Use garden stakes or markers to outline where you will plant each type of bulb. This will help you remember where each bulb goes and ensure proper spacing. It’s also a good idea to draw a planting plan on paper, especially if you’re planting a large number of bulbs or creating intricate designs.
Step 6: Dig holes or trenches
Dig individual holes or a trench for your bulbs, following the depth guidelines for each type of bulb:
Tulips and Daffodils: 6-8 inches deep
Crocuses: 3-4 inches deep
Hyacinths: 4-6 inches deep
Irises: 4-5 inches deep
Space the bulbs according to their size. Larger bulbs need more space, while smaller bulbs can be planted closer together.
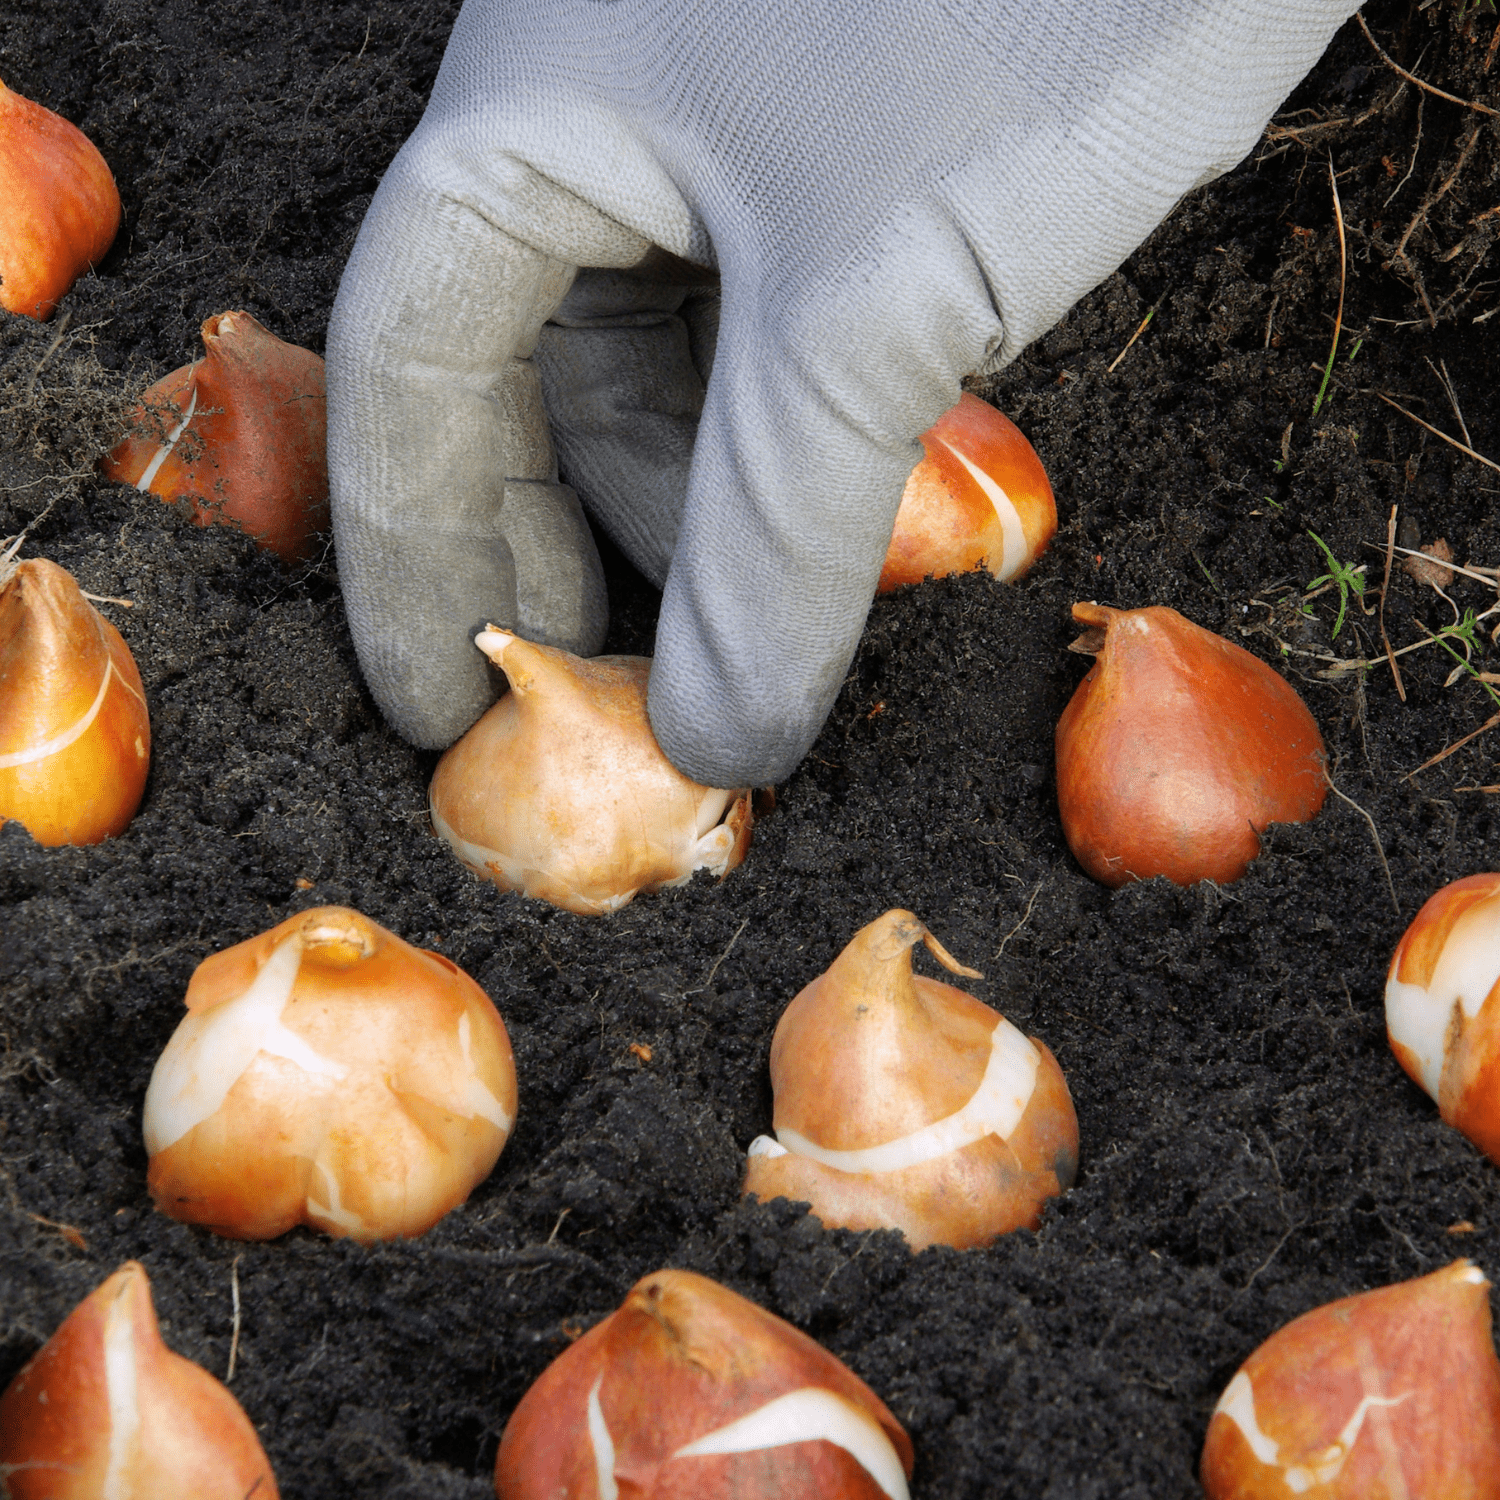
Step 7: Plant the bulbs
Place the bulbs in the holes with the pointed end facing up. Cover them with soil and gently pat it down to remove air pockets. Planting bulbs with the pointed end up ensures that the shoots can emerge easily. If you’re planting bulbs that don’t have a clear top or bottom, plant them on their sides. Nature will sort it out, and the shoots will find their way to the surface.
Step 8: Water and mulch
Water the bulbs thoroughly after planting to help them settle into the soil. Adding a layer of mulch can help protect your bulbs from extreme temperatures and keep the soil moist. It also helps prevent weeds from growing. Mulching is beneficial because it insulates the soil, helping to maintain a stable temperature and moisture level. Organic mulches, such as shredded leaves, straw, or compost, also add nutrients to the soil as they decompose.
Tips for a successful garden
Plant at the right time: plant bulbs in the Fall before the first hard frost. This gives them time to establish roots before winter.
Consider wildlife: some bulbs, like tulips, are favorites of deer and squirrels. If you have wildlife issues, consider planting bulbs that are less attractive to animals, such as daffodils and alliums.
Layer bulbs for continuous bloom: to enjoy a long-lasting display of flowers, layer bulbs with different bloom times in the same area.
When and how to plant Fall bulbs for Spring blooms
on Oct 17 2024
Planting Fall bulbs is a simple yet rewarding task that promises a vibrant and colorful garden in the spring. Whether you’re a seasoned gardener or just starting out, knowing when and how to plant Fall bulbs is essential for a successful bloom. In this blog we’ll walk you through the best time to plant your bulbs and provide step-by-step instructions on how to do it. Get ready to transform your garden with a burst of Spring color!
Why plant Spring-flowering bulbs in Fall?
Fall bulbs, such as tulips, daffodils, crocuses, and hyacinths, are planted in Autumn because they need a cold period to develop roots and prepare for blooming in the spring. Planting them in the Fall allows them to undergo this necessary dormancy, ensuring they burst into life when the weather warms up.
When to plant Fall bulbs
Timing is crucial when it comes to planting Fall bulbs. Here’s what you need to know.
Temperature matters: Fall bulbs should be planted when the soil temperature is consistently below 60°F (15°C) but before the ground freezes. This typically means planting them 6-8 weeks before the first hard frost in your area.
Regional timing:
Northern regions: in colder climates, such as the northern United States, plant bulbs in September or early October.
Central regions: in temperate climates, aim for mid to late October.
Southern regions: in warmer climates, you can plant bulbs as late as November or even early December, but they might need pre-chilling (more on this below).
How to plant Fall bulbs
Planting Fall bulbs is straightforward, but following these steps ensures the best results.
Planting depth and spacing
Location: most bulbs prefer well-drained soil in a sunny spot. Avoid areas where water tends to pool.
Soil preparation: loosen the soil to a depth of about 6 inches (this also depends on the type of bulb) and mix in compost or well-rotted manure to improve fertility and drainage.
Depth: plant bulbs at a depth of about 2-3 times their height. For example, if a bulb is 2 inches tall, plant it 4-6 inches deep.
Spacing: space the bulbs about 2-3 times their width apart. This gives them room to grow and prevents overcrowding.
Planting steps
Dig holes or trenches: use a garden trowel or bulb planter to dig individual holes or a trench if you’re planting many bulbs.
Place the bulbs: place the bulbs in the holes with the pointed end facing up. If the bulbs have a flat side, position it facing outward to encourage uniform growth.
Cover with soil: gently backfill the holes with soil, pressing down lightly to eliminate air pockets.
Water thoroughly: water the bulbs well after planting to help them settle in and start rooting.
Mulching
Apply a layer of mulch (such as straw, shredded leaves, or bark) over the planted area. Mulch helps regulate soil temperature, retain moisture, and prevent weed growth.
Pre-chilling bulbs
In warmer climates, where winters are mild, certain bulbs, especially tulips, may not receive the cold period they need to bloom properly. To solve this, you can "pre-chill" the bulbs before planting. Pre-chilling mimics the cold dormancy bulbs experience in colder regions, which is essential for their development.
The process is simple: place the bulbs in a paper bag and store them in the refrigerator for about 6-8 weeks before you plant them in the garden. It’s important to keep the bulbs away from fruits like apples, as these emit ethylene gas that can damage the bulbs.
After the chilling period, you can plant the bulbs in the ground, just as you would in colder regions, ensuring the soil is still cool. Pre-chilling gives these bulbs the cold they need to grow strong and bloom beautifully, even in warmer climates. By taking this extra step, you’ll be rewarded with vibrant flowers that would otherwise struggle to thrive in milder conditions.
Caring for Fall-planted bulbs
Caring for Fall-planted bulbs is key to ensuring they grow strong and bloom beautifully in the Spring. After planting, it's important to give them a thorough watering to help the bulbs settle and start rooting. Once this is done, they generally don’t need much attention during the winter months, as most of the moisture they require will come from natural rainfall. However, if you live in an area with particularly dry winters, you may need to water them occasionally to prevent the soil from drying out completely.
Another important aspect of bulb care is protecting them from pests. Squirrels, mice, and other animals can sometimes dig up bulbs, mistaking them for food. To prevent this, you can use bulb cages or wire mesh placed over the planting area. Some gardeners also sprinkle blood meal or bone meal around the bulbs, which can act as a natural deterrent for rodents.
As spring approaches and the first shoots begin to appear, you can help the bulbs thrive by removing any mulch that was applied for winter protection. This allows for better air circulation around the emerging plants. At this point, applying a balanced fertilizer can provide a nutrient boost to support healthy growth and flowering. By following these simple steps, your Fall-planted bulbs will be well on their way to producing a beautiful, colorful display when spring arrives.

The best Fall bulbs for beginners
on Oct 07 2024
If you're new to gardening, Fall is an exciting time to start planning for your Spring garden. Planting bulbs in the Fall is one of the easiest and most rewarding gardening tasks, especially for beginners. The bulbs you plant now will sleep through the winter and burst into colorful blooms in the Spring. Whether you're looking to add pops of color to your garden beds or fill containers with flowers, there are plenty of Fall bulbs that are perfect for beginner gardeners. In this blog we’ll show you some of the best options and why.
Why Fall bulbs are perfect for beginners
One of the reasons Fall bulbs are so ideal for beginner gardeners is their simplicity. Once you plant them in the Fall, they require minimal care during the winter. With just a little effort, you can enjoy beautiful results come Spring. Fall bulbs are hardy, dependable, and forgiving, making them a great way to learn the basics of gardening while ensuring success.
Best Fall bulbs for beginners
Here are some of the easiest and most rewarding Fall bulbs for beginner gardeners.
1. Tulips
Tulips are among the most popular and well-loved Spring flowers. They come in an incredible range of colors and varieties, from classic red and yellow to vibrant purples and pinks. Tulips are easy to plant and care for, making them a great choice for beginners. Plant tulip bulbs in well-drained soil, about 6-8 inches deep, and they’ll reward you with show-stopping blooms in the Spring. Keep in mind that tulips look best when planted in groups or clusters rather than in single rows.
2. Daffodils
Daffodils are another fantastic option for beginner gardeners. Known for their bright, cheerful yellow, orange, and white flowers, daffodils are incredibly hardy and deer-resistant. This means you won't have to worry about pests eating your bulbs over the winter. Daffodils are easy to grow in a variety of soil types, and they bloom reliably each Spring. Like tulips, plant daffodil bulbs 6-8 inches deep, and enjoy their reliable performance year after year.
3. Crocuses
Crocuses are one of the first flowers to bloom in the Spring, often peeking through the last of the winter snow. These small, colorful flowers are easy to grow and require very little maintenance. Crocus bulbs are planted just a few inches deep and are great for naturalizing, meaning they will spread and return year after year without much intervention. Crocuses come in shades of purple, yellow, and white, adding early Spring color to your garden.
4. Hyacinths
If you're looking for a bulb that combines beauty with fragrance, hyacinths are a perfect choice. These bulbs produce dense spikes of flowers that are not only visually stunning but also fill the air with a sweet, powerful scent. Hyacinths are easy to plant and require minimal care, making them ideal for beginners. They thrive in well-drained soil and can be planted in beds, borders, or containers. Hyacinths come in a range of colors, including blue, pink, purple, and white.
5. Snowdrops
Snowdrops are delicate, white, bell-shaped flowers that bloom very early in the Spring. They’re one of the easiest Fall bulbs to grow and are perfect for beginners. Snowdrops prefer cooler temperatures and will naturalize in your garden, meaning they’ll return year after year, often spreading to create a beautiful blanket of white. They require very little maintenance and thrive in both sunny and partially shaded areas.
6. Alliums
Alliums are a striking addition to any Spring garden. Known for their tall stems and round, ball-shaped clusters of purple or white flowers, they add architectural interest to your garden. Alliums are part of the onion family, and their bulbs are easy to plant and care for. They’re also deer-resistant and long-lasting, making them a great choice for beginners who want low-maintenance, yet impressive blooms. Plant allium bulbs about 4-6 inches deep in well-drained soil for best results.
7. Grape Hyacinths
Grape hyacinths, also known as muscari, are small, compact plants that produce clusters of tiny, bell-shaped flowers. They’re one of the easiest bulbs to grow and are perfect for beginners. Grape hyacinths are low maintenance and will naturalize, meaning they’ll return each year in larger numbers. These bulbs are ideal for planting in borders or along garden paths, where their vibrant blue or purple flowers will create a lovely carpet of color in the Spring.

Step-by-step guide to planting Fall flower bulbs
on Jul 12 2024
As the leaves fall and the temperatures drop, many gardeners begin to miss the bright, cheerful blooms of spring and summer. But did you know that the key to a vibrant, colorful garden next spring lies in the bulbs you plant this fall? Fall is the perfect time to plant bulbs that will burst into an explosion of color when the weather warms up again. Whether you're a seasoned gardener or a novice, fall-planted bulbs are an easy and rewarding way to ensure your garden is full of life and color next spring.
By planting bulbs in the fall, you set the stage for a stunning spring display. This blog will guide you through the process of choosing, planting, and caring for fall bulbs, ensuring that your garden becomes a vibrant haven of spring beauty. Ready to transform your garden? Let’s dig in and discover the magic of fall-planted bulbs!
How to create a colorful spring garden with fall-planted bulbs
Step 1: choose the right bulbs
Start by selecting healthy, high-quality bulbs. Look for bulbs that are firm and free from mold or damage. Some great options for fall planting include tulips, daffodils, crocuses, and hyacinths. Choosing the right bulbs is crucial because high-quality bulbs are more likely to produce strong, vibrant flowers. If you’re unsure which bulbs to choose, check with your local garden center or search online for reputable bulb suppliers.
Step 2: pick the perfect spot
Most bulbs prefer a sunny spot with well-drained soil. Some, like bluebells and snowdrops, can thrive in partial shade. Make sure the location you choose meets the needs of your specific bulbs. Consider the layout of your garden and how you want the bulbs to enhance your space. Bulbs planted in groups or clusters tend to make a bigger impact than those planted singly. Additionally, consider planting bulbs in layers (a technique called lasagna planting) to create a continuous display of blooms from early spring to late spring.
Step 3: prepare the soil
Prepare your garden bed by removing any weeds and loosening the soil. Adding compost or bulb fertilizer can help improve soil quality and provide essential nutrients. Well-prepared soil helps bulbs establish strong roots, which is key to their success. If your soil is heavy clay or tends to stay wet, consider adding sand or grit to improve drainage. Proper soil preparation also helps prevent problems such as bulb rot, which can occur if bulbs sit in waterlogged soil.
Step 4: dig the holes
Each type of bulb needs to be planted at a specific depth. Here are some general guidelines:
Tulips and Daffodils: 6-8 inches deep
Crocuses: 3-4 inches deep
Hyacinths: 4-6 inches deep
Irises: 4-5 inches deep
Space the bulbs according to their size. Larger bulbs need more space, while smaller bulbs can be planted closer together. Use a bulb planter or a trowel to dig the holes, making sure they are deep enough to protect the bulbs from winter frost and allow them to grow properly.
Step 5: plant the bulbs
Place the bulbs in the holes with the pointed end facing up. This is where the stem will grow. Cover the bulbs with soil and gently pat it down to remove any air pockets. Planting bulbs with the pointed end up ensures that the shoots can emerge easily. If you’re planting bulbs that don’t have a clear top or bottom, plant them on their sides. Nature will sort it out, and the shoots will find their way to the surface.
Step 6: water the bulbs
Water the bulbs thoroughly after planting. This helps them settle into the soil and start the rooting process. Be careful not to overwater, as soggy soil can cause the bulbs to rot. Watering after planting is especially important if the fall weather is dry. Consistent moisture (but not waterlogged conditions) helps bulbs establish strong roots before winter sets in.
Step 7: add mulch
Adding a layer of mulch can help protect your bulbs from extreme temperatures and keep the soil moist. It also helps prevent weeds from growing. Mulching is beneficial because it insulates the soil, helping to maintain a stable temperature and moisture level. Organic mulches, such as shredded leaves, straw, or compost, also add nutrients to the soil as they decompose.
Step 8: mark your planting
Consider marking the spots where you've planted your bulbs. This helps you remember where they are and avoid accidentally digging them up later. You can use plant markers, sticks, or even draw a map of your garden. This step is particularly useful if you’re planting bulbs in an area where you plan to add other plants later or if you have a large garden.
Tips for success
Plant early: the best time to plant fall bulbs is before the first hard frost. This gives them time to establish roots before winter.
Check the depth: planting bulbs at the right depth is crucial. Too shallow, and they might not survive the winter. Too deep, and they might not bloom properly.
Water wisely: keep the soil moist but not waterlogged. Overwatering can lead to rot.
Patience pays off: bulbs planted in the fall may take a few months to show any growth. Be patient and look forward to a beautiful spring display.
Designing your spring garden
When planning your bulb garden, consider the following tips to create a stunning display:
Mix and match: combine different types of bulbs for a variety of colors and bloom times. This ensures continuous flowering throughout the spring.
Layering: plant bulbs in layers, with larger bulbs deeper and smaller bulbs closer to the surface. This creates a fuller, more dynamic garden bed.
Group planting: plant bulbs in clusters rather than single rows. This creates a more natural and impactful look.
Creating a colorful spring garden with fall-planted bulbs is a fulfilling project that pays off with a burst of color and fragrance when you need it most. By carefully selecting, planting, and caring for your bulbs, you can transform your garden into a vibrant paradise that will delight you and your visitors. Start planting this fall, and look forward to a breathtaking display of spring blooms!

Top 10 Fall flower bulbs to plant in your garden
on Jul 05 2024
Planting bulbs in the fall is a wonderful way to ensure your garden bursts with color when spring arrives. We'll give you 10 picks for your spring flowering (fall planting) garden. These flowers will turn your garden instant from winter to spring! Plant these in the fall, and they come up in spring. Here are the top 10 fall flower bulbs that will bring a spectacular array of blooms to your garden.
Top 10 Fall flower bulbs
Tulips
Tulips are a classic choice and come in a rainbow of colors and a variety of shapes. They are perfect for adding a splash of color to your garden beds or containers. When planting tulips, choose a sunny spot with well-drained soil. Plant the bulbs about 6-8 inches deep and 4-6 inches apart. Tulips are versatile and can be used in formal garden designs or informal, cottage-style gardens. To create a continuous display of color, consider planting early, mid-season, and late-blooming varieties.
Daffodils
Daffodils, known for their cheerful yellow blooms, are a garden staple. They are easy to grow and can thrive in both full sun and partial shade. Daffodils should be planted about 6 inches deep and 6 inches apart. They are also deer-resistant, making them an excellent choice if you have issues with wildlife nibbling on your plants. Daffodils naturalize well, meaning they will multiply over the years, providing an ever-increasing display of flowers each spring.
Crocuses
Crocuses are among the first flowers to bloom in spring, often appearing while there is still snow on the ground. These small but vibrant flowers are perfect for borders, rock gardens, and lawns. Plant crocus bulbs 3-4 inches deep and about 3 inches apart. Crocuses come in a variety of colors, including purple, yellow, white, and striped varieties. They are great for naturalizing and will spread over time to create beautiful carpets of color.
Hyacinths
Hyacinths are known for their strong fragrance and dense flower spikes. They come in a range of colors including blue, pink, white, and purple. Plant hyacinth bulbs 4-6 inches deep and 4-6 inches apart in a sunny spot with well-drained soil. Their intense fragrance makes them a perfect choice for planting near pathways or doorways where you can enjoy their scent. Hyacinths are also excellent for forcing indoors, providing beautiful blooms and fragrance inside your home during the winter months.
Alliums
Alliums, or ornamental onions, have unique, spherical blooms that add a whimsical touch to any garden. These flowers grow best in sunny spots with well-drained soil. Plant allium bulbs about 6-8 inches deep and 8-10 inches apart. Alliums come in various sizes, from small varieties perfect for rock gardens to large types that make a bold statement in garden beds. They are also deer-resistant and attract pollinators like bees and butterflies.
Iris
Irises produce beautiful, intricate flowers that are often bi-colored, making them a striking addition to any garden. They thrive in sunny locations with well-drained soil. Plant iris bulbs 4-5 inches deep and about 3-4 inches apart. Irises come in a variety of types, including bearded, Siberian, and Dutch irises, each with its own unique charm. They are ideal for adding vertical interest to your garden and work well in mixed borders and perennial beds.
Peonies
Peonies are beloved for their large, fragrant blooms that come in shades of pink, red, white, and yellow. They prefer sunny spots with fertile, well-drained soil. Plant peony bulbs with the eyes facing up, just below the soil surface. Peonies are long-lived perennials that will reward you with stunning blooms year after year.
Anemones
Anemones, also known as windflowers, produce vibrant blooms that add a splash of color to your garden. They prefer sunny or partially shaded areas with well-drained soil. Plant anemone bulbs 2 inches deep and 3-4 inches apart. Anemones are great for naturalizing and will spread to create colorful patches in your garden. They bloom in a range of colors, including red, blue, pink, and white, and are perfect for adding color to woodland gardens and borders.
Scillas
Scillas, also known as wood squills, produce clusters of small, star-shaped flowers in shades of blue and purple. They thrive in partial shade to full sun and well-drained soil. Plant scilla bulbs 3-4 inches deep and 3-4 inches apart. They naturalize easily and are great for woodland gardens or naturalized areas.
Muscari
Muscaris create a stunning carpet of blue in the garden, often in woodland settings. They prefer shady areas and well-drained soil. Plant Muscaris about 4 inches deep and 4-6 inches apart. Muscaris are perfect for naturalizing in shady areas under trees and shrubs. They provide a beautiful display in spring and are relatively low maintenance. Bluebells are also excellent for attracting pollinators such as bees and butterflies to your garden.
Tips for planting Fall bulbs
Determine your climate zone: fall bulbs are supposed to be planted in the fall. But based on your climate zone this can vary per month. Warmer climates have a later planting window, than colder climates. Remember to plant fall bulbs before the first frost.
Choose the right spot: most bulbs prefer sunny locations with well-drained soil. Check the specific needs of each type of bulb.
Plant at the right depth: follow the recommended planting depth for each bulb type to ensure they grow properly.
Space properly: give each bulb enough space to grow. Crowded bulbs can lead to poor growth and smaller blooms.
Water well: water the bulbs thoroughly after planting to help them settle into the soil.
Add mulch: a layer of mulch can help protect bulbs from extreme cold and keep the soil moist.
Planting fall flower bulbs is a great way to ensure a colorful and lively garden come spring. With a little planning and care, you can enjoy a beautiful display of tulips, daffodils, crocuses, and more. Start planting now and look forward to a vibrant garden that will be the envy of your neighbors.

How to chill and force bulbs: easy tips!
on Mar 03 2024
Flower bulbs bring cheerful colors, and guess what? You can enjoy them even before spring! Flower bulbs are like tiny miracles waiting to happen. Chilling and forcing are like special tricks that help these bulbs bloom early, giving you a burst of colors when you least expect it. Picture chilling as a kind of winter vacation for bulbs. They get a bit cold (around 35°F to 45°F or 1.5°C to 7°C), and this helps them get ready for the big show.
Chilling and forcing bulbs might sound complicated, but don't worry – we'll walk you through it. By creating the right conditions, you can make bulbs bloom earlier than usual. With pre-chilled bulbs for forcing, you become the star of your own indoor garden play, bringing the joy of spring into your home. Let's dive into the world of pre-chilled bulbs for forcing, and discover the secrets to cultivating an early garden indoors.
Understanding chilling and forcing
What is chilling?
Chilling and forcing are techniques that mimic the natural winter conditions that bulbs require to bloom successfully. Chilling refers to the exposure of bulbs to cold temperatures, typically between 35°F to 45°F (1.5°C to 7°C), for a specific duration. This chilling period initiates the biochemical processes necessary for the bulb to develop properly.
What is forcing?
Forcing, on the other hand, involves encouraging bulbs to bloom earlier than they would in their natural environment. By carefully manipulating the chilling conditions and providing the right environment, you can coax your bulbs into producing flowers ahead of schedule.
Step-by-step guide to chilling bulbs
Selecting bulbs:
Choose high-quality bulbs from a reputable source. Opt for bulbs that are firm, free from disease, and appropriate for your climate.
Pre-chilling preparation:
Place the bulbs in a breathable container like a mesh bag or a perforated plastic bag.
Store the bulbs in a refrigerator or another cold storage area at a consistent temperature between 32°F to 50°F (0°C to 10°C).
Duration of chilling:
The chilling duration varies for different bulb varieties. For example, tulips generally require 12-16 weeks of chilling, while daffodils may need 15-17 weeks. Check the specific requirements for the bulbs you have.
How long do Tulips need to chill before forcing?
Tulips, those iconic harbingers of spring, require a specific chilling period to prepare for the forcing process. The chilling duration for tulip bulbs largely depends on the variety you've chosen. In general, tulips need about 12 to 16 weeks of chilling to develop properly and produce the stunning blooms we all adore.
However, it's crucial to note that different tulip varieties may have slightly different chilling requirements. Some may thrive with a shorter chilling period, while others might benefit from a more extended stay in the cold. To ensure optimal results, always refer to the specific guidelines provided for the tulip bulbs you've selected.
As you embark on the journey of forcing tulip bulbs, patience becomes your ally. The beauty that awaits is well worth the wait, and by understanding and respecting the chilling needs of your tulip bulbs, you set the stage for a spectacular indoor garden display.
How to force plant bulbs
Choose the right container for forcing bulbs: select a container with drainage holes to prevent waterlogging. You can use glass vases, shallow bowls, or specialized bulb forcing vases.
Prepare the growing medium for forcing bulbs: use a well-draining potting mix, and fill the container about two-thirds full. Moisten the soil, but avoid overwatering, as pre-chilled bulbs can rot in excessively wet conditions.
Planting the pre-chilled bulbs for forcing: place the pre-chilled bulbs on the soil surface, allowing them to touch each other without crowding. Cover them with more soil until just the tips are visible.
Watering pre-chilled bulbs for forcing: water the bulbs lightly after planting and maintain a consistent level of moisture throughout the forcing period.
Provide adequate light for forcing bulbs: place the containers in a cool, dark location during the initial stages of forcing. Once shoots emerge, move them to a bright, indirect light location.
Temperature regulation for forcing bulbs: maintain a temperature of around 60°F to 65°F (15°C to 18°C) for optimal growth. Cooler temperatures during chilling and warmer conditions during forcing contribute to successful blooming.
How long does it take to force bulbs?
Once your pre-chilled bulbs have completed their cold treatment and are transferred to a conducive environment for forcing, the countdown to blossoms begins. The duration it takes to force bulbs into full bloom can vary based on several factors.
On average, you can anticipate the emergence of blooms within 2 to 4 weeks after initiating the forcing process. However, this timeframe is a general estimate and may fluctuate depending on factors such as the bulb variety, environmental conditions, and the overall health of the bulbs.
Some bulbs may be eager to show off their colors sooner, while others may take a bit more time to unfurl their petals. Monitoring the growth progress, providing adequate light, maintaining proper temperature conditions, and keeping an eye on soil moisture levels all contribute to a successful forcing experience.
In essence, the journey from pre-chilling to forcing bulbs is a rewarding process that requires a balance of patience and care. As you witness the first signs of growth and the eventual burst of vibrant blooms, you'll find that the time invested in understanding and implementing these techniques is truly the key to a flourishing indoor garden.
Pre-chilled bulbs for forcing
Pre-chilled bulbs for forcing are like nature's time capsules, holding the promise of early spring blooms right at your fingertips. These specially prepared bulbs undergo a cool winter hibernation, carefully stored in a state of dormancy until it's time to awaken their vibrant potential. By subjecting these bulbs to a period of chilling – a winter vacation of sorts – in a cool, dark place (around 35°F to 45°F or 1.5°C to 7°C), garden enthusiasts can orchestrate a synchronized spectacle of colors indoors. This deliberate chilling process, tailored to the specific needs of each bulb variety, ensures that the plants receive the necessary signals to flourish when brought into the warmth of your home. Pre-chilled bulbs become your allies in defying the seasons, offering a burst of nature's beauty even in the midst of winter, making them an indispensable element for any indoor gardening enthusiast."
How to force bulbs in water
If you're feeling a bit adventurous, you can also force bulbs in water! Choose a container with enough space for the bulb to sit on top without fully submerging it. Add water to the container, making sure the bulb's base touches the water. Place the setup in a cool, dark spot for a few weeks until roots develop. Once shoots emerge, move the container to a brighter location, and watch your bulbs bloom without soil.
Forcing bulbs in water is a unique and captivating method to bring the beauty of blooms indoors. This process not only adds a touch of nature to your living space but also provides a front-row seat to the fascinating growth journey of your favorite flowers. Let's dive into the steps on how to force bulbs in water, creating a stunning display that will brighten up your home.
Selecting the right bulbs:
Begin by choosing bulbs that are suitable for forcing in water. Hyacinths, narcissus, and paperwhites are excellent options for this method.
Opt for pre-chilled bulbs for forcing to ensure they've gone through the necessary winter rest, preparing them for the blooming process.
Choosing the perfect container:
Select a clear glass or transparent container to allow you to witness the growth of roots and shoots. The container should have a wide enough base to provide stability for the growing bulbs.
Ensure the bulbs can be positioned just above the water, allowing the roots to reach down.
Preparing the bulbs:
If your bulbs aren't pre-chilled, you can still force them in water. However, it may take a bit longer for them to bloom.
Place the bulbs on top of pebbles or decorative stones in the container, allowing the roots to grow down into the water without submerging the bulbs completely.
Adding water and setting the stage:
Pour water into the container until it reaches just below the base of the bulbs. The roots will seek out the water, promoting healthy growth.
Place the container in a cool, dark location for the initial stage of forcing. This encourages robust root development.
Transitioning to light:
Once roots have developed, move the container to a bright, indirect light location. This signals the bulbs to start producing shoots and leaves.
Rotate the container regularly to ensure even growth, and keep an eye on the water level to maintain a consistent moisture level.
Enjoying the blooms:
In a few weeks, you'll witness the magical transformation as shoots emerge and vibrant blooms unfold.
Display your blooming bulbs as a centerpiece or in various containers for a charming indoor garden.
How to force Tulip bulbs indoors
Tulips are the stars of many gardens, and they can shine indoors too! After chilling your tulip bulbs, plant them in a pot with well-draining soil. Ensure the bulbs are covered but not crowded. Water them gently and keep the soil consistently moist. Place the pot in a cool, dark spot during the initial stages, and once shoots appear, move it to a brighter area with indirect sunlight. With proper care, you'll witness the vibrant beauty of tulips brightening up your indoor space.
Growing tulip bulbs indoors is a delightful venture that allows you to enjoy the iconic tulip blooms even before the arrival of spring. Here's a step-by-step guide:
Selecting tulip varieties: choose tulip varieties known for their suitability for indoor growth. Look for high-quality, pre-chilled tulip bulbs that are ready to grace your home with their vibrant hues.
Choosing the right container: opt for a container that provides ample space for the tulip bulbs and has drainage holes to prevent waterlogging. A well-ventilated container, whether it's a pot or a decorative planter, ensures a comfortable environment for your tulips to thrive.
Preparing the planting mix: use a well-draining potting mix, combining soil with organic matter. Fill the container with the mix, leaving enough space for the tulip bulbs to be planted at the right depth.
Planting Tulip bulbs: position the pre-chilled tulip bulbs on the soil surface, ensuring they are not too close but have room to grow. Cover them with additional soil until just the tips of the bulbs are visible.
Watering with care: after planting, water the tulip bulbs gently. Ensure that the soil remains consistently moist but not waterlogged, as tulips prefer a well-balanced watering routine.
Providing the right light: initially, keep the container in a cool, dark spot for about 2-3 weeks to encourage root development. Once shoots emerge, transition the tulips to a brighter location with indirect sunlight, allowing them to soak up the light needed for blooming.
Temperature control: maintain a room temperature around 60°F to 65°F (15°C to 18°C) for optimal tulip growth. This temperature range provides a cozy environment for the bulbs to transition from chilling to forcing, ensuring a successful and vibrant display.